Glamping photos make it look effortless: a plush bed under canvas, a fire pit glowing at dusk, coffee with a view. But when it comes time to actually book a glamping trip, many first-timers freeze. When should you reserve? What should you ask the host? And what counts as a fair price for a night in a tent?
This guide walks you through the whole process, one step at a time. You’ll learn how to pick your dates around crowds and weather, choose between safari tents, yurts, domes and treehouses, set a budget that holds up, and handle deposits and cancellation windows with confidence. We’ll also cover the questions to ask before arrival and what to realistically expect once you’re there, so the trip itself feels as smooth as the photos promised. Grab a notepad, and let’s get your trip booked.
Step 1: Decide When You Want to Go Glamping
Dates are the first and most important decision, because they shape everything else: availability, price and even which sites you can choose from. Glamping calendars fill differently than hotel calendars, and the window for booking matters more here than almost anywhere else in travel. A small safari tent operation may have only a handful of units, so a single busy weekend can wipe out availability for an entire month. Weather also plays a bigger role than it does for city hotels, since a cold or rainy stretch can change the whole feel of a stay under canvas. Before you fall in love with a particular dome or treehouse, decide roughly when you want to travel and how flexible you can be around it.
- Target June through August for the warmest weather. These are the peak months at most glamping sites, so expect the widest choice of dates but also the heaviest demand. Book 3-6 months ahead if you want your pick of the popular tents and domes.
- Consider April-May or September-October for a quieter trip. Shoulder-season stays mean fewer crowds and easier availability, and booking 4-8 weeks ahead is often enough to find good options.
- Watch for minimum-stay rules. On summer weekends and holidays, many sites require 2-3 nights rather than a single night, so plan your calendar around that before you commit.
- Check regional weather before locking in dates. Mountain and desert seasons differ, so a month that’s perfect in one region can be chilly or blazing hot in another.
Once you’ve settled on a window that fits your region and schedule, write down two or three candidate date ranges, including a midweek option if your schedule allows. Midweek dates are often easier to secure and can sidestep minimum-stay rules altogether. Having flexible options makes the next steps, choosing a style and a site, far easier, and it gives you a fallback if your first choice is already full when you start checking availability.
Step 2: Choose Your Glamping Style and Location
Not all glamping is the same, and the differences between stay types matter more than most first-timers expect. A yurt in a storm and a cabin in the same storm are two very different nights. Canvas walls thin out in cold weather, domes can turn into greenhouses on sunny afternoons, and a treehouse with a spiral staircase is a poor match for anyone with limited mobility. Take a few minutes to match the structure to your needs before you fall in love with a photo.
- Compare the main stay types. Safari tents, yurts, geodesic domes, treehouses and cabins each offer different comfort levels. Tents and yurts feel closest to nature, domes often deliver the biggest views, and cabins sit at the most sheltered end of the spectrum.
- Match the tent type to your needs. If you’re traveling in cooler months, look for heating. For stays of several nights, an en-suite bathroom makes a real difference. It’s worth reading a proper guide on how to choose the right glamping tent for your stay before you commit.
- Narrow the location with practical filters. Consider drive time from home, nearby activities like hiking or paddling, and whether you want deep seclusion or the convenience of on-site dining. A remote site may offer stunning silence but limited food options, so check whether you’ll need to bring your own meals and supplies.
- Read recent guest reviews. Focus on the newest ones and look for comments about cleanliness, noise and accuracy, so you can verify the photos match reality. Reviews written after rainy weather are especially useful for spotting leaks, mud problems or drainage issues.
A site that fits your comfort level, drive time and expectations is worth more than a fancier structure in the wrong place. Think about who is coming with you, too: families often prefer cabins with solid walls and nearby bathrooms, while couples chasing dark skies may happily trade shelter for a dome with a clear ceiling. Shortlist two or three options that tick all four boxes before moving on to budgeting, and keep a backup in case your first choice is already taken.
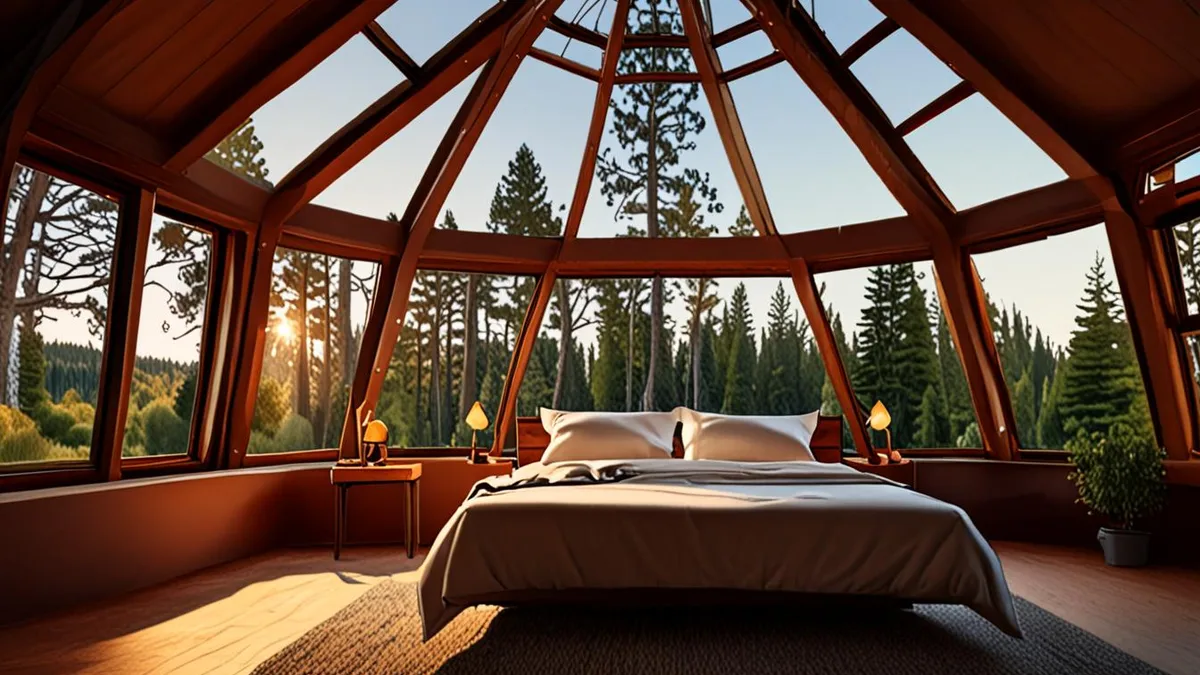
Step 3: Set a Realistic Budget
Glamping prices swing widely, and sticker shock is common when first-timers see the top of the range. Setting a realistic budget before you browse keeps you from falling for a dome you can’t justify, and it helps you compare sites on true total cost rather than the headline nightly rate. It also narrows your search fast: once you know your ceiling per night, half the listings on any booking platform drop away, saving hours of scrolling.
As a starting point, expect around $100 per night for basic tents, while luxury domes and lodges run $500+ per night. Weekend rates are often 20-40% higher than weekday rates, so shifting a stay to Sunday through Thursday can noticeably lower the bill for the same tent. Two midweek nights at a nicer site sometimes cost the same as one weekend night at a mid-range one, which is worth weighing if your schedule has any flexibility. For a deeper breakdown of what drives pricing, this guide to how much glamping typically costs is a useful reference.
- Meals: remote sites may have no restaurants nearby, so add the cost of groceries or on-site dining to your trip total.
- Activities: some sites charge separately for extras like guided hikes, kayak rentals or firewood bundles.
- Cleaning fees: many sites bill these on top of the nightly rate, and they can add a meaningful chunk to a short stay.
- Pet or extra-guest charges: if you’re bringing a dog or a third person, ask upfront whether fees apply.
Total the nightly rate, the weekend premium and the extras, and you’ll have a number you can actually plan around. Write it down before you start comparing sites, because a tempting photo can quietly pull you $150 a night over budget without you noticing. With a realistic figure set, you’re ready to book with confidence.
Step 4: Book Your Stay
Once you have picked your dates and found a stay you like, the booking itself is where a little care pays off. Glamping sites vary widely in how they handle deposits, cancellations and communication, so it helps to know what to expect before you hand over any money. Some operators run everything through a booking platform, others manage reservations by email or phone, and the level of service can differ just as much as the tents do. A few minutes of checking now can save you real money and stress later, especially if weather or travel plans force a change. Here is how to lock in your trip without surprises.
- Reserve directly with the site when possible. Booking through the owner or operator usually means clearer communication and more flexible changes if your plans shift. You can ask questions before paying and reach a real person if something comes up during your stay.
- Plan for a deposit at booking. Many glamping sites require a 30-50% deposit when you reserve, with the balance usually due before arrival. Check when the final payment is due so it does not catch you off guard.
- Confirm the cancellation window before paying. Free cancellation typically ranges from 7 to 14 days before check-in, but this varies by site. Ask for the policy in writing so you know exactly how much flexibility you have.
- Book peak-season weekends early. Popular domes and safari tents often sell out months ahead for summer weekends and holidays. If you want a specific unit on a specific date, reserve as soon as your plans are firm.
Before you pay, it also helps to ask how the site handles problems. What happens if a storm damages your tent, or if the operator needs to move you to a different unit? A quick question about their backup plan tells you a lot about how professionally the site is run. Keep copies of your confirmation, deposit receipt and any written promises about amenities, since these make any later conversation much easier.
While you wait for your trip, use the downtime to get ready. A good glamping packing checklist will help you arrive prepared, especially if your site is deep in the countryside. Put your final payment deadline and cancellation cutoff in your calendar as soon as you book, so neither date slips past you unnoticed.
Step 5: Confirm Details and Prepare for Arrival
A great glamping trip starts with knowing exactly what you have booked. Sites differ enormously in what they provide, and the photos on a listing rarely tell the whole story. A few quick messages to your host before departure can make the difference between a smooth arrival and a confusing one.
Start by confirming the practical basics. Ask what time check-in opens, where you should park, and whether your phone will get any signal on site. Remote locations often have patchy coverage, so download maps and any booking confirmations before you leave home. Also ask whether linens and towels are included, since some sites provide full bedding while others expect you to bring a sleeping bag.
Then dig into the amenities, because “glamping” means different things at different properties. Use this list as a starting point:
- Kitchen facilities: some sites offer a full shared kitchen, others just a camp stove or a fire pit for cooking, which changes what food you should bring.
- Showers and toilets: en-suite bathrooms are common in luxury domes, but many safari tents and yurts rely on shared blocks a short walk away.
- Heating and cooling: a wood stove or electric heater matters enormously on cool nights, so confirm what is provided rather than assuming.
- Fire pits and extras: ask whether firewood is included or sold on site, since gathering your own is rarely allowed.
Finally, use the site’s own packing guidance to build your list. Hosts know their location best, and remote spots often call for extra layers and a reliable flashlight even in summer. A few minutes of preparation means you can settle in and enjoy the view instead of hunting for basics.
Step 6: Know What to Expect on a Glamping Trip
Glamping gives you a real bed, solid walls of canvas or wood, and often electricity, but it is still the outdoors. Insects will find their way in occasionally, temperatures can swing sharply between afternoon and night, and you will hear wind, birds and sometimes rain on the roof. None of this is a flaw; it is the point. Knowing it in advance helps you pack and plan with the right mindset.
Setting Expectations for Your Group
Glamping sits somewhere between a hotel and traditional camping, and it helps to explain that clearly to your travel companions. Unlike tent camping, nobody needs to pitch anything or sleep on the ground. Unlike a hotel, there may be no restaurant on site, sound carries between units, and wildlife is part of the neighborhood. Travelers who expect hotel silence may be surprised by roosters or rustling leaves, so a quick conversation before the trip keeps everyone happy.
Arriving in Daylight
Whenever possible, plan to arrive in daylight. Many glamping sites have unlit paths, gravel tracks and entrances that are hard to spot after dark, and finding your unit by flashlight for the first time is nobody’s idea of a relaxing start. Arriving while the sun is up lets you learn the layout, meet your host, and watch the light fade from your deck with a drink in hand instead of a map. If a late arrival is unavoidable, ask your host for detailed directions and landmarks ahead of time so you are not guessing at the last turn.
Your Glamping Trip, Booked with Confidence
Glamping photos make everything look effortless, but the booking stage is where most first-timers freeze: when to reserve, what to ask the host, and how to tell a good deal from an overpriced one. The good news is that a few clear decisions take care of all three. Start with your dates, weighing peak-season warmth against the easier availability and value of the shoulder months. From there, everything else falls into place.
Next, match a stay type and location to your budget, whether that is a simple tent in a meadow or a lavish dome with a private deck. Book early for popular weekends, keep the cancellation window in mind, and confirm the practical details before you go: amenities, check-in, and what to pack. Do that, and the trip itself should feel as easy as the booking looked online. If this guide helped you plan your first trip, leave a comment or share it with a friend who needs a nudge outdoors.